Showing posts with label product review. Show all posts

Thursday, February 7, 2013

Diadora Jet Racer shoes - Cadel's Kicks!

I used to have a thing for shoes.  I know, very metro, but it was a fetish that landed some very nice shoes in my closet.  I had some Prada, Allen Edmonds, Ferragamo and Cole Haan.  There is nothing like slipping on a high end pair of hand made dress shoes.  Not only did those shoes last, they were luxurious in their comfort, made you feel like you were walking on air and made a statement when walking into a room.  Dress for success was my mantra.  They were worth every penny, or 40,000 pennies as it were.  I don't dress up everyday anymore like I did 10 years ago, but my affinity for nice shoes still lingers.  However, I care much more about my kicks for cycling than what I wear to church on Sunday.

CamelBak Classic 70 oz Hydration Pack - Racing Red (Google Affiliate Ad)

I've ridden a few pairs of cycling shoes over the years.  I had some nylon soled Specialized shoes in high school and rode Shimanos, then Axo's, during my MTB days in the late 90's.  All very low tech.  When I started road riding again in 2006 I went cheap again with some entry level Shimanos.  I ended up winning a slick pair of Scott shoes in a prime but they didn't fit.  I sold them and went for my first pair of carbon road shoes, again from Shimano.  They worked well enough.  Stiff, stylish, but a bit thick in the sole.  I wore those things out and went for a set of Bontrager RL's.  A super thin carbon sole got me closer to the pedals but they never really fit me quite right.  I never got my cleats in a good position and the screws from the cleats kept poking through to my feet.  The toe box collapsed and I ended up having to warranty the shoes.  They just didn't fit my feet.  I actually think my season suffered a bit last year because of the shoes.

Over the past few months, I've expanded my rep portfolio to include Diadora shoes.  Diadora has an incredibly complete line of road and MTB shoes.  3 different lasts, various color options and sole choices that range from basic nylon to the exquisite Net Breathing System carbon sole found the the highest end Jet Racer.

The Jet Racer is now what I'm on.  Just like my Pradas, the Jet Racers are worth every bit their $459 MSRP.  I finally had the chance to put some good miles on the kicks last weekend in St. George.

Out of the box, these shoes are sexy.  There's 4 color options for the Jet Racer and they come with a very cool lizard skin pattern that blends nicely with the standard Diadora graphic.  I'm wearing a size 43, a half size smaller than the Bontragers, but a half size bigger than my last Shimanos.  It seems to be a sweet spot for the Diadora sizing for my foot.

The Build

Handbuilt in Italy, the fit and finish of the Jet Racers in second to none.  The excellent craftsmanship translates nicely over to the less expensive options in the line.  The Jet Racers have a micro adjust buckle and 2 velcro straps, one with a novel plastic locking mechanism.  There's also a velcro "security strap" under the buckle, so these shoes aren't going anywhere.  The leather upper is supple and the heel is cupped by a nice thick piece of plastic.

The sole is truly a work of art.  The woven carbon lower shell is thin and stiff and heavily vented.  This venting is part of the Net Breathing System, which is much more than just simple holes for air to pass through.  Its actually a multi layer, breathable structure which includes vented insole, a waterproof breathable membrane, a wire mesh and then the carbon sole.  Again, a work of art.  The photos I have hear don't begin to do it justice.  There's also a replaceable heal and toe pad.

The Fit

The Jet Racer comes with Diadora's Regular Race Last, meaning its a purposeful, snug fit.  I think a cycling shoe should fit like a ski boot and make you feel connected to the bike.  However, a little room is nice so your feet can swell a bit as can happen on long rides.  My feet feel right at home in these shoes.  On the first ride they felt like my old Shimanos did after years of riding, meaning they were comfortable, so comfortable in fact I forgot I had shoes on at all.  I assuming they are narrower than other non-italian brands, but I can only say for sure they are more narrow than the Shimanos but not as narrow as the Bontragers.  My heel feels solidly locked into the shoe, the plastic heel cup doing its job.

The Ride

Again, these kicks are so comfortable I forgot I had them on.   I had to keep looking down at my feet to remind myself they were there, which wasn't a bad thing, since these are the nicest looking shoes I've had the pleasure of slipping on my feet since my last pair of Prada loafers.  Stiff when powering up a climb, super light and no less comfortable after 5 hours in the saddle.  I was shocked actually.  I believe good equipment is equipment you don't have to think about and I only think about these shoes when I want to admire how sessy they are.

I also seemed to have nailed my cleat placement.  Amazing since I never felt like I had it quite right on the Bontragers.  Two trips up and down the street is all it took.  Don't know if that had anything to do with the shoes, but it was a nice bonus!

Buy 'em!

The Jet Racers are the real deal.  I'm a firm believer that you get what you pay for.  When I was spending crazy money on my dress shoes, it was well worth it when I was still wearing those shoes 5 years later.  Some of those shoes have passed on, but I keep re-soling a pair of Pradas because the uppers and insoles are holding up so well.  Diadora spreads the Jet Racer's features across the line and you can find the unique Net Breathing System soles on the less expensive Vortex and Mig Racers as well.  There's also a full carbon sole on the Aerospeed Carbon and Aeorspeed Women's shoes.  But dollar for dollar, there's no better shoe that money can buy than the Jet Racer.


Thursday, January 17, 2013

Marker Baron 13 AT Bindings

Today's installment of "what I use and why" I'm reviewing the Marker Baron 13 AT Binding.

In my years long build-up to purchasing my own alpine touring set up, I had the opportunity to demo and read about every binding out there.  5 years ago, their wasn't really a resort worthy, burly AT binding available.  The Fritschi Freeride was available as well as some options from now defunt Naxo.  But in the last few years, the options for AT skiers have exploded with offerings from Salomom, Atomic, Tyrolia and the company that started it all, Marker.

Backcountry Skiing Utah (2nd Edition) by Bradley, Tyson [Paperback] (Google Affiliate Ad)

When Marker came out with the Duke it really lit a fire under the industry.  Suddenly, people who worried about durability in their bindings or who didn't really want a lightweight set up, could free their heels for short tours and skin tracks.  While the model has its drawbacks, there really is no compromise in downhill performance and toughness.  In fact, the new binding outperformed many traditional alpine bindings.  The unique toe piece design has found its way into most of Marker's lineup.  The Duke was hefty, functional and expensive.  It came with a DIN of 16(!) to make sure the huck masters of the world blew their knees before losing their skies.

 When it came time for my own  purchase, I had a pretty good idea of what I wanted.  I've had a few days on Fritschi Freerides and while they toured great, their durability was lacking.  Twice I rented Fritschi's and had them fall apart during my backcountry trips.  They're made to be light and they tour quite well, but having them break was disappointing.  I like the new offerings from Salomon and Atomic but budget constraints meant those were out of the picture.  I don't trust used bindings so my quest led me to the Marker Baron.  The Duke's I found in my price range were white, but in my experience white plastic isn't white for very long and I hate yellowing stuff that was supposed to be white.

The Baron is built very much the same as the Duke but with more plastic and less metal.  This lightens the set up by about a 1/4 pound for a weight of 2480 grams for my large binder size.  The Baron also has a DIN of 13, which is plenty for me and my weight.  I actually have them set on 9 so I have plenty in the binding.

Downhill Performance

When first stepping into the Baron, there's a solid, confidence building click.  More like a thud really.  You know your attached to the ski.  The stack height of 34mm is a taller than a traditional binding but that creates some leverage for turning.  The huck masters prefers something closer to the ski, but I appreciate the extra leverage.  With my Rossignol Bandit B94's and Salomon Quest 12 boots, there really is no sacrifice in downhill performance.  My set up is just as burly as any big mountain, high performance rig out there.  I can turn in any condition of snow, feel confident in moderate drops and I know they'll last with some resort abuse as well.

Uphill Performance

Just as with my Quest 12 boots, uphill is where the compromises come into play with the bindings.  While not as heavy as the Duke's, the Barons are still heavy.  If you're carrying your skis, its definitely noticeable.  The skin up also takes a bit more energy.  This may not be the rig for a week long tour, but my goals aren't really week long tours.  If I ever do that, I'll go rent some lightweight gear at REI.

The change between downhill and uphill mode can also be a pain.  The lever to switch from tour to ski mode is underneath the boot.  While this ensures a secure latching of the mechanism, it makes it so you have to remove your skis to get into downhill mode.  This is a time consumer more than anything as you touring pals may have other bindings that can be swtiched with the skis still on.  The Fritschi, Salomon and Atomic bindings all have that feature, just as lighter tech style binding do as well.  With those you can remove your skins without removing your skis.  Again, not the biggest deal but if you're racing for lines, this could be an issue.  It could also be an issue if your somwhere where removing your skis for the downhill would be dangerous.  In my experience though, those kinds of areas would have to be hiked to anyway, with your skis removed already.  The lever must also be cleaned of snow and ice before switching to ski mode.  While the system does have its drawbacks, the one big thing it has going for it is that there is no chance of the binding switching to tour mode while skiing.  That's something I have experienced on the Fritschi and it wasn't fun.

The binding also features a 3 position climbing bar for 0, 7 and 15 degrees of lift.  The bar can be moved with your pole ends but not as easily as the Fritschi.

The walking movement of the binding is smooth and natural.  The binding actually moves aft a few mm's when in touring mode for a better stride.  To me, while heavier, it felt smoother than the Fritschi in the skin track.

So, in short, this binding is awesome for going downhill.  You really give up nothing in skiing performance.  You do compromise for the uphill but durability is awesome.  For most all mountain skiers who like the resorts but still want some BC adventure, this binding rocks.  If you're heavier or like to huck your meat, the Duke may be better for you, but the cost goes up about $100.  I haven't skied the Sally's, Atomics or Tyrolias. but they claim to have addresses some of the drawbacks of the Markers.  You may start finding some deals on those this spring and summer however.  If its the uphill your concerned about, the Fritschi Freeride may be your speed but again, good luck finding a deal.  Its also good to note that the Dukes and Fritschis require wider skies whereas the Barons require a ski of at least 78mm wide at the waist.

My advice is to demo all you can before you purchase.  REI and most college rental programs now have the Markers and Fritschis in their line-ups.  You may be able to demo the other brands at your local shop as well.  If a touring set up is what you want though, there are plenty of options!

Wednesday, January 2, 2013

Salomon Quest 12 Boots


For the past few years I've been renting and demo'ing alpine touring equipment, surveying the latest products and trying to dial in my choices.  Cost is what was mostly holding me back and the fact that I haven't skied nearly as much as I would've like over the past couple of seasons.  So when I finally pulled the trigger on my own AT kit, I tried to do so for less than $600.  While this limited my choices somewhat, my homework from the last few years really paid off when it cam time to shop for gear that may be a few seasons old.

I scored a huge deal on some never used Rossignol Bandit B94's so that allowed me some extra money for boots and bindings.  I don't trust used bindings and the boots I found we also NIB, leftover from last year's stock.  Today we'll discuss my boot purchase.

With a little extra money I discovered used boots were not much cheaper than buying "new" 2012 boots. But that also depended heavily on the brand.  The best AT boots I've demo'ed were from Scarpa.  I loved the Tornado Pro's and Typhoons but I couldn't find Typhoons for less than $400 and the deals I found on Tornados were cosmetic 2nds.  The cosmetic 2nds wouldn't be such a big deal but the issue was yellowing of the white parts of the boot.  My last set of Rossi boots had a huge piece of white plastic that yellowed over time and I hated the way it looked.  I know, trivial, but I had waited this long to buy my AT gear and wanted to get it just right.  I also felt that while the Tornados were just a bit too "touring" focused and not "alpine" enough.  The Typhoons would have fit the bill, but again, no luck on price.  I've demo'd Gamont's as well, but they really did not agree with my feet.  I never had a pair feel quite right and I always had pain in various parts of my feet and shins.  I never had a chance to wear anything from Black Diamond.

So that led me to the more traditional alpine brands that are now carrying alpine boots with grippy soles and a walk function.  The formula is simple, providing stiff, bomber freeride boots with just enough functionality to tour.  These types of boots are much heavier than offerings from Scarpa, Garmont and Black Diamond, but you really give up no downhill performance.

I narrowed my search to Lange Blaster Pro's and Salomon's Quest 12.  The Lange's because I've had Lange before and they fit well and the Sally's because they have a big local Ogden presence and a good reputation. The other good thing about the Sally's is that the 2013 Quest offerings aren't much different than the 2012 boots and I could try a few on before settling on a size.  I really, really wanted the Quest Pro Pebax, with its lighter weight and rockered sole, but missed out on my size waiting to decide.

With a few trips to Alpine Sports in Ogden, I narrowed in on a size, 27.5, and found a deal that was $100 better than any Lange's I found so I went with the Quest 12's.

The Ride
"ski mode"

The Quest's come with 3 buckles and and huge power strap that really serves as the 4th buckle.  I assume this design is to save weight.  I think they should just go one step further and get rid of the small first buckle on the the forefoot as well.  I've never skied a pair of boots, AT or otherwise, where that small buckle really made much difference.  I think a single oversized buckle across the foot would do just fine and save a few ozs.  There's a super grippy rubber sole on the bottom with the requisite slick DIN part for compatibility with alpine bindings.  The liner has a nice Boa type lacing system which keeps the liner snug even when the boots are loosened a bit for hiking and touring.  The rest of the boot is solid traditional overlap construction.

My first outing on my new boots began with the skin uphill.  So my first assessment is of the tourablility of the boots.  I knew they were going to be heavy so there was no surprise there.  While the walk function is simple (flip the lever up to walk, down to ski) I am disappointed with the range of motion in walk mode.  Its hard to tell if the boot is actually canting forward and back or if I'm just flexing the boot or moving a but with the buckles loosened.

"walk mode"
That's the only issue I have with the boots though.  Once we packed up the skins and got into ski mode, the boots performed just as good as any stiff alpine boot should.  They drive my 94 mm waisted Rossi's with ease in the deep powder and the hard packed cat track back to the car.  They busted through the crud of my first outing and drove me down the fall line in Saturday's knee deep.  I couldn't be happier with their downhill performance.


2012 vs. 2013

Why am I reviewing last year's gear?  Well, as I said before, there's no real difference between the 2012 Quest 12 and 2013 Quest 120 other than the color.  Both are rated at a 120 flex.  Also, if you're like me and looking for a deal, its nice to know someone has used the gear you might be looking for.

There is a Quest 120 Max, which comes with a heat moldable shell, not just a moldable liner.

Now, there is some bad press out there about Sally's AT offerings, but those issues had to do with the Dynafit compatible soles of earlier offerings, NOT the traditional soled AT boots that I have.  Salomon has been building boots a long time and I trust them.  While their early foray into tech fittings was bad, their AT product looks like it will serve me well.

Conclusion

While the Quest 12's are on the heavy side for touring and the walk function could be improved overall I'm happy with my boots.  I care more about the down than the up and with my traditional alpine skis, I wanted a boot that would drive my skis without issue.  I tend to get into some rowdy terrain and I want a bomber set up that will get me home safely.  It looks like there's still some deals on Quest 12's out there but the new Quest 120's and Max's look like an awesome set up as well.  When buying boots however, I believe fit is the number one concern, so go try some on or hit your local resort's demo days.  If you're willing to forgo the "newest and latest" there are deals to be found everywhere.  Just be sure to give your local shop some love when it comes time to mounting and servicing your gear!

Thursday, December 13, 2012

My first AT setup

I've been skiing since I was 9 years old.  My parents divorced when I was 8 and skiing was one of the activities my dad got us into on our weekends with him.  I didn't ski much in high school because of swimming but picked it up later in college.  After moving to San Diego and sailing pretty much full time, the skis got hung up for a few years again.  But in 2000, I met my wife, who's hometown is Bishop, CA, a short 30 minute drive to Mammoth Mountain, one the best places to ski on earth.  I couldn't NOT start skiing again.  So for the next few years, I just rented and demo'd skis to see what I had been missing.  At the time, I had missed the whole shaped ski revolution so the new skis completely changed my experience.  The new shapes made skiing so much easier and I found myself progressing back into the aggressive and bigger lines quite a bit quicker than I had expected.  And at Mammoth Mountain, there's no shortage of steep, big lines.

I find myself however hiking more often than not, looking for the less tracked, more adventurous terrain.  This quest for more and bigger stashes lead me to skiing more sidecountry and true backcountry lines, just as the trend for side country access and alpine touring gear was beginning to take off.

6 years ago, alpine touring gear was hard to come by.  Most AT gear was lightweight and made more for mountaineers who were willing to trade ski-ability for lightweight.  The only real option for traditional alpine type bindings that could tour was the venerable Fritschi Freeride binding and some boots from Scarpa and Garmont.  I spent 2 years renting equipement from REI when my buddies and I wanted to spend some days in the backcountry, which was expensive and inconvenient.  For the past 4 years, I've been dreaming of my perfect AT setup and this winter finally got the green light to invest in some real gear.

The real issue has always been finding the funds in the budget to pull the trigger.  As you know, most of my recreation time is spent cycling, which is not a cheap sport.  So my quest turned to putting together an AT setup for less than $600.

I'm happy to report, mission accomplished!  It took some work however.

Skis can eat up quite a bit of the budget so I set out to find something in good shape but a few years old.  After and thorough search I finally landed on a pair of Rossignol B94's that had been mounted once but never used.  The real kicker?  They were only $80!  Sure, they're a few years old and I'm missing out on the whole rocker revolution, but they're plenty wide, have a wood core and are leaps and bounds an upgrade from my 12 year old 70 mm wide Rossignol Bandit X's.  Those skis served me well so I think I'll get some good years out of the "new" B94's.

The benefit in waiting this past few years to invest in my own gear is that technology for AT gear has really progressed. I don't trust used bindings, so I found a killer deal online for a new pair of model year 2011 Marker Baron AT bindings.  Marker really got the ball rolling with resort worthy AT bindings with the Duke about 5 years ago, but I don't need a DIN of 16, so I saved a few pesos going with the Baron, which tops out with a DIN of 13.

The final piece of the puzzle was boots.  Just about every major boot maker now has a high end alpine boot with a walk function and gripy rubber soles, so I had a lot of options.  I'm actually convinced all ski boots should have a walk function and traction soles, simply for getting through the parking lot!

With my previous resort setup, I was actually in boots that were way too big.  I managed with thick socks and aftermarket insoles, but a loose fitting boot surely isn't ideal. I've been very satisfied with the Scarpa Typhoon and Tornados I've demo'd over the years but good luck finding a deal on Scarpas.  So I narrowed my search to the Lange Blaster Pro and Salomon Quest 12 boots.  I've owned Langes before, you know, the badass yellow ones from 20 years ago that made you at least look like you were legit?  But I couldn't find a pair to try on in Ogden.  There is an awesome Salomon dealer however close by, so I went in, tried on a few sizes and settled on the Quest 12.  The guys at Alpine Sports were very gracious in letting me shop fully knowing my intention to go online.  Salomon also has its NA headquaters here in Ogden, so its nice to support local companies.  The pair I found online were new in box so I now I'm set!

I really prefer to support the local shops, but just couldn't do it on my budget.  I did have Alpine Sports mount my ride and do my boot fit.  I'm sure their margins are better on service anyway, so I made sure to share the love.

Now, I just need to use the stuff!  I was dying watching my friends take in the first turns of the year on October and November before the resorts opened, but no longer! I have freed myself from the confines of lift tickets and ropes and look forward to many backcountry days.  I'll review my gear once I get on it and hopefully will help someone else make their own freeing AT purchase this year.


Monday, June 4, 2012

Trek Madone 7

This is a great time of year.  Its hotter 'n hell, there's a fresh copy of the VeloNews Tour de France guide near my toilet and the big bike companies start previewing their new bits gearing up for Le Tour.

The latest to do so is Trek.  VeloNews has just released some photos of the new Madone 7 at the Dauphine.  From the author's comments and the photos, it sounds like Trek has intregrated some aero design into the new frame...Kamm tail foils, under BB rear brake, wide set fork legs, the whole aero nine yards.  This makes an easy choice for those who want to ride Trek but have been wondering about all those other dudes and dudettes on slick Specialized Venge's and Scott Foil's.  With the intro of the Domane, and now an aero Madone, Trek looks like they're serious about the most popular segments of the market.

We'll see how much of this pro version of the 7 comes to the public, but all in all, it looks promising.  It makes me glad I've put off my new frame purchase a bit!  We'll check in with my favorite shop once the new bike is available.

Monday, May 21, 2012

Mercury M3C's and Bontrager R4 tires

I'm stoked to be repping for Mercury Wheels.  Not just a great value, Mercury Wheels are great all around wheels.  I've now been on a few pairs as we've cycled the demos through a few shops and under some racers.  The latest set I've been able to sample is the M3C's, Mercury's most popular carbon wheelset.   They're full carbon 38 mm clinchers hand built in the USA with White Industry hubs and Sapim CX-Ray spokes.  They tip the scales at a svelte 1380 grams and retail for around $2199. 

Having ridden the 58 mm version of this wheel for the last 2 seasons, I was interested to find out if I could tell the difference between the 2.  The shallower M3C's are definitely less aero, but the lighter weight is also very noticeable.  I was also pleasantly surprised that even with my 180 lb sprinter heft, I can't feel one bit of flex.  They ride just as solid as my 58's did.  With a few sprints on the 38's I can accelerate faster and short power climbs are a non-issue.  Like I said, there's an aero difference when I'm on the front but not so much so that one can't make a great solo effort on these.

How do these compare to other brands?  I've ridden the Enve 45 clinchers and can honestly say there's no reason to spend the extra coin on the Enve's.  Enve's are quality wheels and they have a great team running the shop and both are stiff, light, semi aero and fast, but Mercury's comes in about $400 less.  (We'll discuss the new wider profile hoops in another post)  That's some real savings there.

The M3C's are a great all around wheel set.  While the depth may be lacking some aero qualities, they make up for it by being light and stiff.  This would be a great all around wheelset for anybody, especially crit racers and sprinters, but also for climbers.  They's be great in windy conditions or a perfect 'cross wheelset.  For TT's and triathlons, a deeper wheel would be beneficial but for lighter ladies this wheelset makes a lot of sense for just about any type of road cycling.  There's a set of M3C's right now at The Bike Shoppe in Ogden just waiting for your inspection!

Every great wheel needs a nice set of tires to go with it.  For the last year, Bontrager's R4 has been my race day rubber.  Let me say, these tires are FAST!  Coming in at 160 grams, they're some of the lightest clinchers you can buy.  A 220 tpi casing makes for low rolling resistance and they feature a very cool aero wing that Trek claims is worth 9 seconds per 10km.  I can't vouch for the aero-ness, but these have been my favorite tires so far.  I've had Conti GP4000's and ridden the Michelins and the R4's are noticeably faster.  They can be a bit harsh on rough roads and the light weight means you won't get a lot of mileage out of them but if you have a race day set of clincher wheelset, the R4's are worth a look.  Get them for about $70 per at The Bike Shoppe with your new Mercury M3C's!!


Thursday, April 19, 2012

Mercury S-Alloy wheels

I'm not paid to blog about products or do reviews.  I don't have manufacturers sending me their latest bits to test and report on and I hardly consider myself an expert in all things cycling.  I like writing reviews about the equipment I actually use and about products I have some tie to.  Unlike a magazine review, reporting on my own equipment hopefully provides some greater insight to the stuff as its used in the real world by a regular guy.  My latest review is no different.

Although I am "pedaling" Mercury Wheels these days as a dealer rep, this is my third season on my Mercury carbon clinchers.  And even though you may think this review will be totally biased because of that, know that I never endorse or sell products I don't believe in.  It was that way when I worked in retail from simple sporting goods to high end electronics for sailboats.  Its also one of the main reasons I left banking.  I could no longer sell the junk the banks were throwing down the customers' throats.  I have the same philosophy with Mercury Wheels.  I wouldn't have become a rep if I didn't believe they were the best wheels for the money.  After riding on Mercury's alloy offering, I'm even more convinced I'm selling an awesome product. 

Mercury Wheels really has something to offer everyone.  From their top end, ultralight MZero and M Series tubulars to the midrange S Series carbon clinchers on down to the S Alloys we're talking about here.  Mercury even has a killer rear disc for half the price of most other manufacturers.  The S Alloys represent a set of wheels that should appeal to a broad audience and I've found their performance to be on par or better than any other alloy wheelset I've used.

The first thing you'll notice about the S Alloys is their width.  At 23 mm, they're a mm wider than most other alloy offerings.  The extra width allows me to run lower pressure in my tires without any increase in rolling resistance.  This is nice as I have been training on my alloys and the lower pressure has smoothed out the ride quite a bit.  This feature also comes in handy for using these wheels in cyclocross as the lower tire pressures can offer more traction.

The hoops have a shallow aero V profile much like the Sram 27 mm deep alloys.  The spokes are round, not bladed however.  Just as with all Mercury Wheels, these are hand built by the artists at the Handspun facility in Wisconson.  They're laced to Mercury engineered and branded hubs with Sapim Race spokes in 24/28 traditional spoke patterns.  The clinchers I have weigh a respectable 1550 grams and are tubeless compatible.  The wheels are also available as tubulars, another bonus for the 'cross riders out there.

Over the last week I've been on some pretty cruddy roads, sprinted through some intervals and done some steep climbing repeats.  Many times, I have forgotten that I was on alloy wheels and not on my carbon hoops.  This goes a long way in describing the high quality ride of these wheels.  They've soaked up bumps yet don't flex at all when hammering.  I really wish I had these wheels at the Tour del Sol crit with the 40 mph crosswinds.  I would have had so much more control yet still had a lightweight, stiff wheels underneath while racing. 

So why would anyone want alloy wheels in this "gotta have carbon" world?  For one, cost.  These wheels retail for just under $700.  Not the cheapest wheelset in the world, but they're hand built in the USA and have some great tech for an alloy.  Its also in the ballpark for high end alloy wheels.  Secondly, these wheels present a great option for 'cross.  The V profile sheds dirt and mud and the tubeless and tubular options give the 'crosser a lot of choices.  Third, these make a great back up and training set for those with a nice set of carbon wheels they want to keep for racing.  They make a great second pair as well for races that might encounter dirt roads or huge cross winds.  I've had my $200 alloys in the wheel car before, and they are boat anchors.  Having the S Alloys in the wheel car leaves me much more at ease knowing my back ups will be light and durable.

Watch for Mercury Wheels in select bike shops in Utah soon.  They're already available from The Bike Shoppe in Ogden and Jans Mountain Sports in Park City.  If you see me at a race or ride, I'll always have both sets close by for you to check out.

Finally, it is Friday, so lets get ready for the weekend with this awesome clip of Tyler Farrar's win at last year's Tour.  Its aint everyday you see the yellow jersey leading out a sprint train!

Wednesday, March 14, 2012

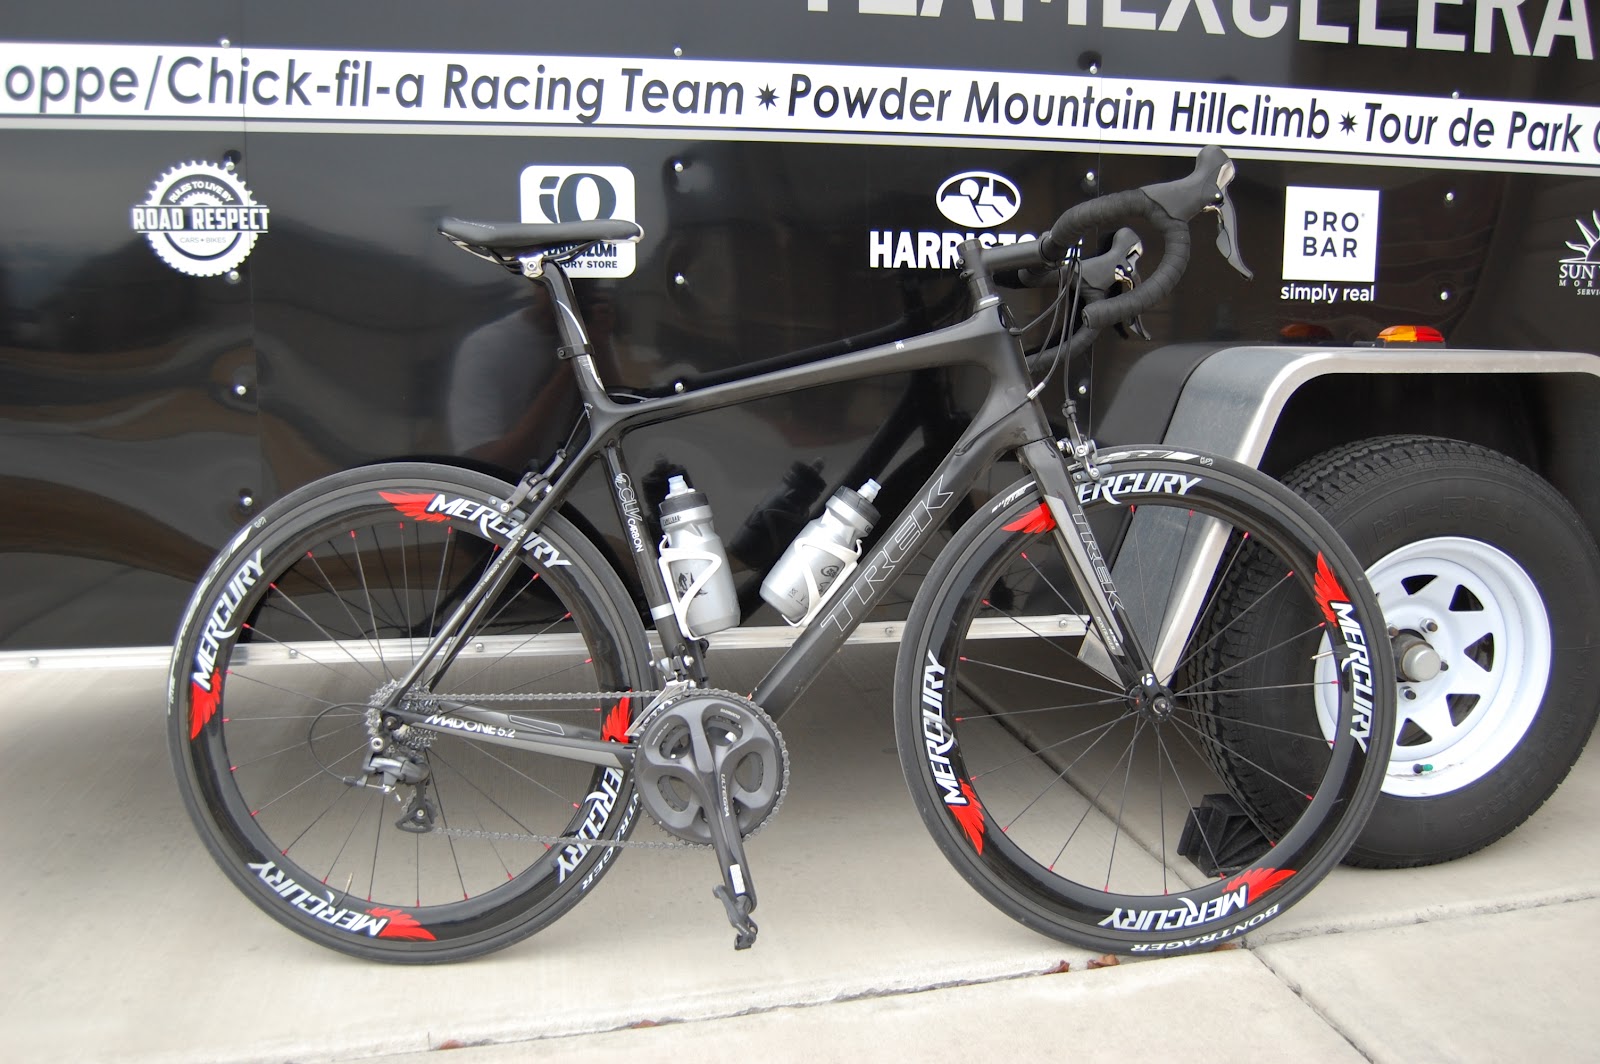
2012 Trek Madone 5.2

I admit it.  I'm a gear geek.  One of the things I love about cycling is all the cool stuff involved.  From magnesium shift levers to carbon fiber water bottle cages, I love all the technology involved.  I once thought I loved the tech of bikes (and boats, too) so much that I majored in mechanical engineering for a while in college.  Turns out I suck at math.  I discovered a theorem in calculus that said as your GPA moves closer to zero, engineering majors become business students.  I proved that theorem like nobody's business!  Unfortunately that was the only one I could prove.  Regardless, even though I can't prove with math why carbon fiber does what it does, I do appreciate and enjoy that there's a nerd out there somewhere who can.  Its awesome that we to enjoy the fruits of their labors!

The latest bit of high tech kit I've been able to sample is the 2012 Trek Madone 5.2.  Its the demo bike loaned to me from The Bike Shoppe while my steed gets some TLC at the shoppe.  The 5.2 really is the best value in bikes today.  It comes with a full Shimano Ultegra grouppo, Bontrager Race wheels and a Bontrager RXL and Race cockpit and retails for $3469.  Throw a set of nice carbon wheels like the Mercury M5's and you've got a serious race rig for around $5500 that weighs around 15 lbs.  For 2012, the 5 Series Madones are still made in Asia, but now feature Trek's propriatary OCLV build process, just like the top end 6.9 SSL.  The only difference is the quality of carbon in the layup.  The bike I'm on has an awesome paint job as well.  The flat balck and clear coat carbon is muy sessy!

The ride

The bike is a killer value.  But what about the ride?  Trek Madones have a great reputation and have proved themselves under the butts of some great champions.  Its a great all all around bike and does a lot of things well.

The first thing I noticed from my bike is the stiff front end.  While some of this comes from the all aluminum cockpit, the head tube and fork steer tube seem to be making for some of the stiffness as well.  In a sprint, I really felt connected to the road via the front end.  Bottom bracket stiffness felt comparable to my bike and I didn't notice too many bumps coming up through the saddle.  Out on the road my teeth get rattled a little from the from end, but on the crit course I really appreciated that stiffness.

The fit

Madone's have a slightly sloping top tube and I'm on a 56 cm frame.  The head tube is a little tall for me, but I might be on the taller H3 frame.  At the shoppe we rushed the fit and I don't think we got the front end quite where it needs to be.  We should have spent more time on my fit, but its a temporary demo, so no biggie.  Dropping the stem on the steer tube would help a ton.  The 6 Series Madones are available in a really aggressive H1 geometry which drops your hands even more.  For most riders, I assume the middle of the road H2 set up is sufficient.

The grouppo

I'm a big Sram fan but the Ultegra grouppo that comes standard on the 5.2 is light and functional.  I had some issues shifting at Saturday's crit, but I think that was mostly attributed to not being used to Shimano vs. Sram.  Shifting under load and in the sprint is no issue.  Cranks felt really stiff and power transfer was great.

The value

Again, I really feel the 5.2 is the best value in cycling.  For the serious racer an upgraded wheelset is needed but being able to save so much on the platform allows you to get into a decent wheelset.

While I'm not affiliated with Trek directly, The Bike Shoppe in Ogden is a Trek and Mercury dealer and the best shoppe around.  And even though the 2012 5.2 is a killer deal, The Bike Shoppe is UNLOADING 2011 5.2's!  $2500 out the door!!!  The 2011 features the same geometry and spec as the 2012 but features the previous gen TCT carbon build, rather than OCLV.  Again, slap some good wheels on there and you are racing for around $4500.  You can't beat that!

Wednesday, February 1, 2012

Sram Red - Its official!

For those who read my blog, its no secret I'm a huge Sram fan. From my first Grip Shift in 1994 until now, I love the simplicity and functionality of it all. My team has been a part of the Grassroots Sponsorship package for 3 years as well and its a great company to work with.

As promised, Sram officially released their 2012 Red grouppo today. Cycling News has the scoop (here).

By sticking with a mechanical 10 speed group, Sram is really setting themselves apart from Campy and Shimano. Campy is sexy stuff but can be finicky and Shimano has a winner with Di2 but it remains out of reach price wise for most. The new Red group is still the weight leader at 1739 grams and they've addressed the shortcomings of noise and front shifting.

The front shifting looks revolutionary to my eye. The cage swings asymmetrically to kill the need for a trim feature. A chain catcher is now standard as well. The machined cassette is said to be quieter as well. The shift and brake levers are evolutionary but still look to have the same functions as before. I like the single pivot breaks too!

I have 2 years on my Force groupset so I may be looking to upgrade at least the derailleurs and cassette this spring. If that happens, you'll be the first to know and I'll review as well. Until then, I'm totally satisfied with my Force grouppo. Its been great over two seasons of hard training and racing and looks like it will be a great tool for me this year as well.

Sunday, January 29, 2012

Serfas Phantom Carbon Saddle

I like personal product reviews versus magazine reviews because they provide real world feedback to the nuances of particular equipment, especially over the long term. I've found when it comes to bike saddles however, even the best reviews won't compare to actually getting your keester on one and going for a ride. Nonetheless, I thought I'd share my saddle of choice because as with many things I just kind of "arrived" at my saddle and have stuck with it, even when I've had to hunt for a replacement.

Choices, choices

Saddles are interesting because what fits one person may or may not fit another. Some go for the most comfortable while others will go for the lightest possible. I think most shoot for somewhere in between. Some manufacturers like Specialized and Bontrager have gone to varying widths based on butt measurements and there are others like Adamo who have completely re-thought saddles with pretty funky looking shapes. Many lineups feature saddles for folks who are more bent over or for riders who like to ride more upright. Fizik has become popular over the last few years with their Arionne model which offers a platform for the rider to slide forward and back quite a bit while there are tried and true saddles like the Selle Italia Flight and Lance Armstrong's long time choice of Selle San Marco's Concor Lite.

18 years, 2 saddles

When I started mountain biking in 1994, I had a $300 Specialized Hard Rock. I quickly started upgrading components to lighter and more functional bits. I also had to keep up with my buddies. Needless to say that by the time I was done with that Hard Rock, it was the pimpn'est $300 mountain bike around!

One of my first upgrades was a new saddle. I went to my local bike shop and picked out what I though looked comfortable but light. I chose a Bontrager with its trademark "clipped ears". The sides of the saddle were cut off to allow the rider to slide back off the saddle for descents. Titanium rails, reasonable padding and I probably paid around $100. When I upgraded my bike to a Stumpjumper, the saddle came with me. The Stumpjumper was stolen and I got a Scott Pro and quickly swapped out saddles to the Bontrager. I sold the Scott in 2000 and got a classic Bontrager OR hardtail. I spec'ed the bike with, you guessed it, the same Bontrager saddle.

In 2006 I purchased my first in a long time road bike. I got a Lemond Tourmalet. The low grade saddle that came with the bike was too thick and too heavy for my tastes. The saddle I had been using on my mountain bikes for so many years was really built for MTB'ing so I went to the Performance Bike catalog. The Forte Pro SLX looked the part, was light at 205 grams, had a nice cutout for my taint and was only $50. I put a lot of miles on that saddle and loved it. I had found saddle #2.

I upgraded to a carbon bike in 2009 and spec'd the Forte once again. But when I got a new bike for 2010, Performance had discontinued my beloved saddle. How could they?!?! An exhaustive search of the interweb turned up nothing. But in my search I stumbled across the Pronto SL-Z2 made by Velo. Score! It was the same shape, same shell and same rails with only some cosmetic changes. Same $50 price tag too! The ride was spot on. I lucked out. But this winter, after 2 solid racing seasons, the Velo wore out and it was time to replace.

I went back to the interweb and sure enough, the Pronto had also been discounted. Search number 2 yielded a perfect replacement.

Serfas Phanton Carbon


While Velo stopped selling the Pronto, they keep making it and marketing it under the Serfas brand as the Phantom Carbon (Serfas website) This time however its been upgraded with braided carbon rails which dropped the weight to 155 grams. I'm happy to report that the saddle is a spot on replacement and upgrade of the Forte Pro SLX I ordered in 2006. Comfy, light and even more damp with the carbon rails than its predecessors. The retail price jumped a bit to $170 but thanks to The Bike Shoppe and Serfas the price was right.

The carbon rails are a bit thicker than the ti rails so I had to swap out the guts to my seat clamp. With my shorter crank arms however the change evened out and I only had to adjust my seat mast top 1 mm.

The saddle measures out at 273mm x 133mm.

I did try out a few different saddles last winter while training at The Bike Shoppe's spin lab. The Selle Italia SLR Gel Flow was un-bearable. The Fizik Arionne has a long, flat top which is great for moving around but felt like I was sitting on the seat post without a saddle. I rode a Fizik Aliante which I liked quite a bit, but its shapely cut made moving around on the saddle difficult.

The Serfas Phanton Carbon, like its ancestors, is a neutral shape. I'm a larger framed guy and it feels like the saddle would fit different body types. You'd also have to spend over $200 to find a comparable weight carbon saddle so its a great value. If you're taint is suffering, a new saddle may be needed. I highly recommend this saddle and Matt over at The Bike Shoppe in Ogden would be glad to set you up!

Monday, January 16, 2012

Quarq Power Meter

Power meters have definitely become the "tool du juor" for the competitive cyclist. As I've moved up the road racing ranks, the kit used has become lighter, stiffer, more technical and yes, more expensive. Carbon frame? Check. Aero wheels? Check. Power meter? I can check that one off as well.

My new Quarq Power Meter (http://www.quarq.com/) is finally installed and I've got 3 rides so far on the unit. Beyond being a super sexy piece of black aluminum and carbon, its proved so far to be a simple and functional bit of kit that will help me reach my lofty cycling goals this year.

To be honest, there is a bit of an arms race going on in amature cycling. A power meter and other training tools should actually be higher on the list than a pimped out bike or the latest electronic grouppo. The limiting factor in most people's performance isn't their equipment but their motor. Improving one's fitness is the most cost effective way to better results. I could spend $10,000 trying to get my bike under 14 lbs, but its free to cut 500 calories from my day and drop 10 lbs in a few weeks. I'm guilty of participating in the arms race, but a power meter is my next step towards the goal of improving my fitness.

Since picking up the road bike after a long hiatus in 2006, my training has become more and more dialed and focused. It started with some weekend rides with neighbors then evolved to taking in some centuries in preparation for my first LOTOJA in 2007. I invested in a heart rate monitor at that point and began tracking my training and focusing on "periodization". That got me through the 2011 season and I accomplished a huge goal...upgrading to Cat 3. But I plateaued in what I can accomplish with a HR monitor and self coaching. So for 2012, I have hired Dave Harward at Plan 7 Coaching and invested in a power meter.

In my mind, I've been comparing using the power meter to all the instruments used on a racing sailboat. While its possible to go out by yourself on a 14 foot dingy with a compass and find your way around, many larger racing boats have a host of instruments to fine tune performance. There's heading, velocity made good (VMG), true wind, apparent wind, boat speed and even rig tension. All these measurements are available to the crew on large displays on different parts of the boat. My bike computer now looks like the sailboat displays. I now have multiple reference points to gauge my performance: time, speed, distance, cadence, heart rate and now power.

I chose the Quarq over other options for a number of reasons:

  • Crank based. I use multiple wheelsets, so having a crank based power meter was key. CycleOps Powertap hubs are popular and cost effective but limits wheel choice.


  • Cost. Once I decided on crank based, there's really only 2 options: Quarq or SRM. SRM meters are a good $1000 more than the Quarq. Pedal based systems are also well north os the Quarq in price.


  • Simplicity. The Quarq's battery can be changes with a trip to The Shack. SRM require sending the unit back to SRM for servicing.


  • Calibration. Spin twice backwards and twice forwards. Done.


  • There are two drawbacks however. First, the non-drive side axle sticks out a bit from the bottom bracket shell of my frame. This set up could potentially be less stiff than my previous Sram Force crank which was flush. Second, the cranks arms are a bit flatter and so my heels rub when I'm out of the saddle. To protect the finish from my heels, I've put some clear sticky back on the crank arms. While the finish is now protected, I'll have to get used to my heel rubbing every now and then.

    Functionality is great however. The system is super smooth and the Sram Red chainrings are stiff and quite sexy in black.

    So, so far so good. As I get more rides and start analysing the data, I'll be able to comment more. I'm using Garmin's 500 computer as well and I'll report on that in another post.

    A huge thanks to The Bike Shoppe and Sram for the Grassroots sponsorship, which made this purchase possible!

    Tuesday, December 20, 2011

    More Sram Red photos leaked

    Sram continues to tease with photos of the new Sram Red group due out in February of next year. I suppose with the lack of an electronic group, they're really trying to create some buzz around the all-new mechanical grouppo.

    http://www.cyclingnews.com/features/six-more-teaser-photos-of-the-upcoming-2013-sram-red-group

    The details continue to impress me however. Single pivot brakes to reduce weight, true hollow arm carbon cranks and the front derailleur with anti-chain rub mechanics designed right into the unit. I like the new ribbed hood design as well. As a Sram user for the last 3 years, some extra grip on the rubber is a welcome addition.

    While Sram has denied going electric the article points out an interesting observation from their "careers" website, a posting for an electrical engineer! While the job description calls for skills that are needed for power meters and other non-drivetrain technology, it may be an open door for an electric grouppo. While the cost of electric groupsets make them out of reach for me, its exciting that maybe Sram could be the cost leader and maybe they've been waiting to develop more accessible technology.